The Cutest Crochet Pumpkins
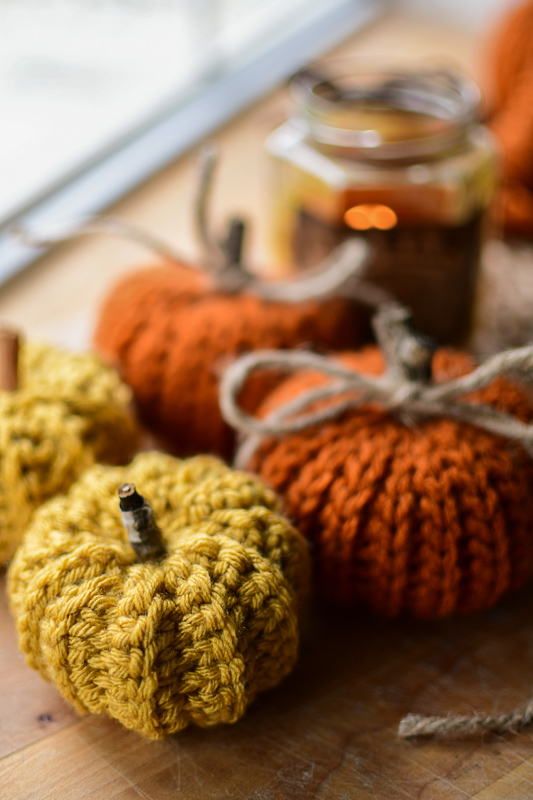
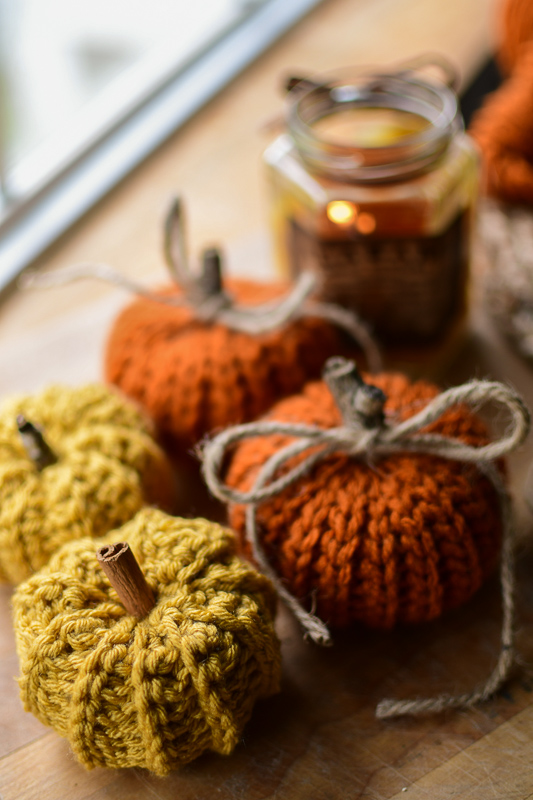
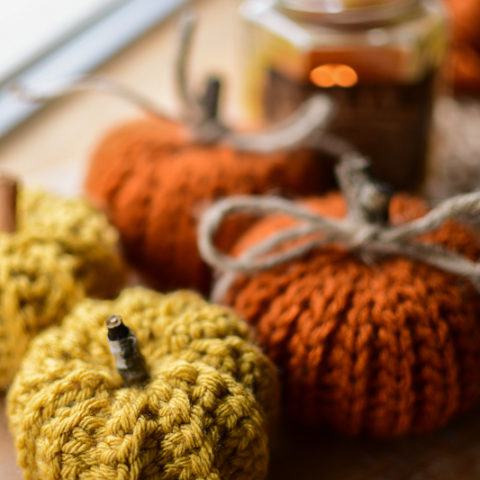
These crochet pumpkins are one of my favorite things to make when fall rolls around. I make several each year and most of them end up getting gifted to friends and family that see them on my mantel and want them. Homemade seasonal decorations will always be my favorite and these pumpkins add a touch of rustic style and whimsy.
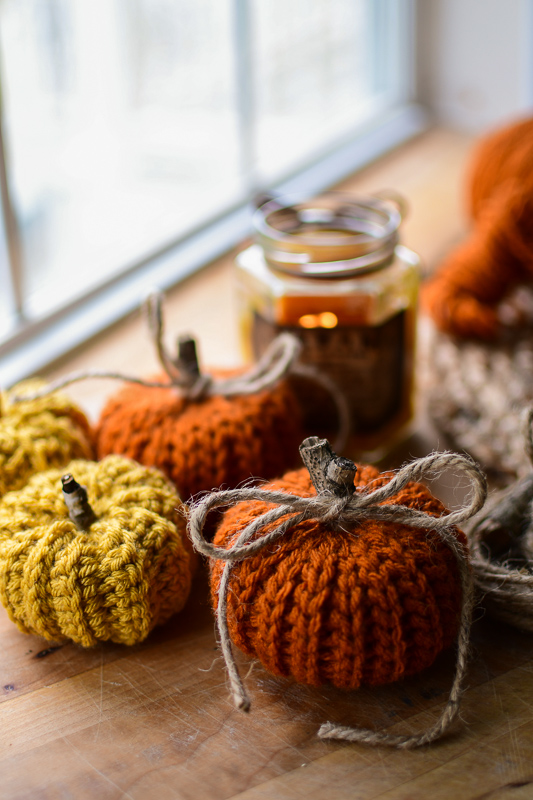
They’re tiny and adorable and completely customizable. You can make them as big or as small as you like! They’re perfect for using up yarn scraps and don’t require a lot of time either. Using basic crochet stitches, these can be whipped up in less than 30 minutes for the small size. Light your favorite candle and turn on a fall episode of Gilmore Girls and let’s get to stitching!
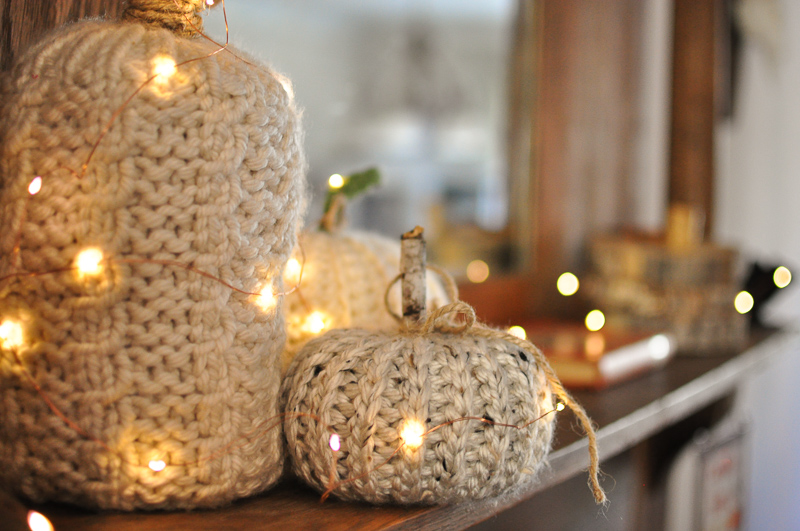
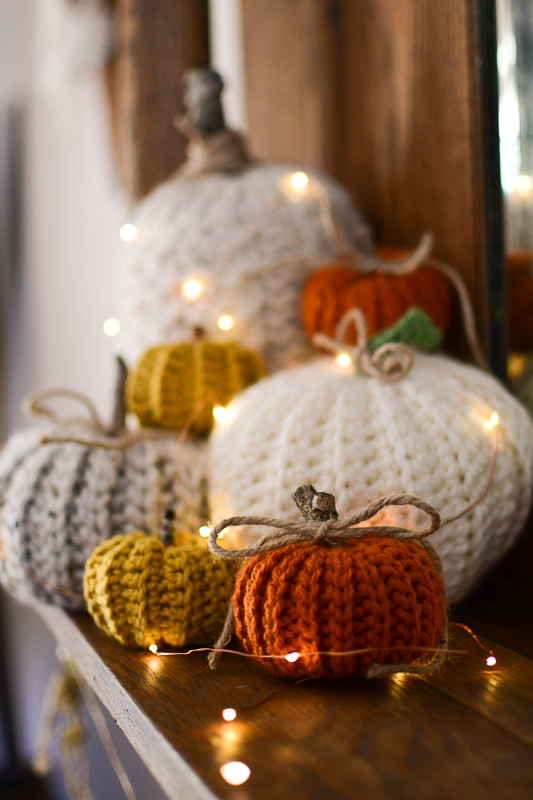
For variety, I’m offering 3 different ways to crochet pumpkins. Pick one or pick all! You can’t go wrong with these cuties.
This post contains affiliate links, which means I make a small commission at no extra cost to you. See my full disclosure here.
Here’s everything you need to know about making crochet pumpkins:
Skills needed: Single Crochet in Back Loop Only, Half Double Crochet variation (with a special stitch described below), Slip Stitch in Back Loop Only, and seaming edges
Supplies:
You’ll need your yarn of choice, hook, twine, stick, cinnamon stick, or yarn for the stem and poly-fil stuffing. You could also use ribbon instead of twine (I’m partial to that farmhouse look but you use whatever you like!)
You can use any weight yarn you prefer, just match your hook to your yarn.
Yarns:
Small pumpkins: #4 worsted weight yarn: Hobby Lobby’s I love this yarn in Burnt Pumpkin, and Soft & Sleek in Mustard
5 or 5.5 mm crochet hook depending (I’ve used both, the slip stitch pumpkin is a little easier with the 5.5mm)
Large pumpkins: Lion Brand Hometown yarn in Aspen Tweed and Michael’s Loops and Threads Cozy Wool in Fleece
9 mm hook
Tips:
- Especially for the slip stitch pumpkin, keep your tension slightly on the looser side. If your stitches are too tight it will be hard to work through the slip stitches, and too loose and you could have stuffing showing through your finished pumpkin.
- When the pumpkin is complete, don’t stuff too tightly. This isn’t like making amigurumi toys where you want it super stuffed. These pumpkins should be soft and squishy. Add just enough stuffing to shape it, but don’t overfill.
- The row count isn’t necessary to keep track of unless you want to. I crochet until I have a long rectangle that is about double the length of the width. This gives a perfect round pumpkin.
Patterns
All instructions are for the small pumpkins pictured. To make larger pumpkins, use bulkier yarn and larger hooks. You can also make larger pumpkins with the worsted weight as well, just make your starting chain longer. To make smaller pumpkins, make your starting chain shorter. You can also use smaller yarn and hook to make even tinier pumpkins. Chain any number desired, this will dictate the height of your finished pumpkin. Crochet a long rectangle until the length is around twice the width of the short edge.
Pumpkin # 1: SL ST BLO
Leaving a long beginning tail, Chain 14
Row 1: slip stitch in back loop only of 2nd chain from hook, repeat across row. 13 stitches. Ch1, turn work.
Row 2: Slip stitch in BLO across row, Ch 1, turn work.
Continue row 2 for 30 something rows or until your work is double the length of the width.
To finish the pumpkin
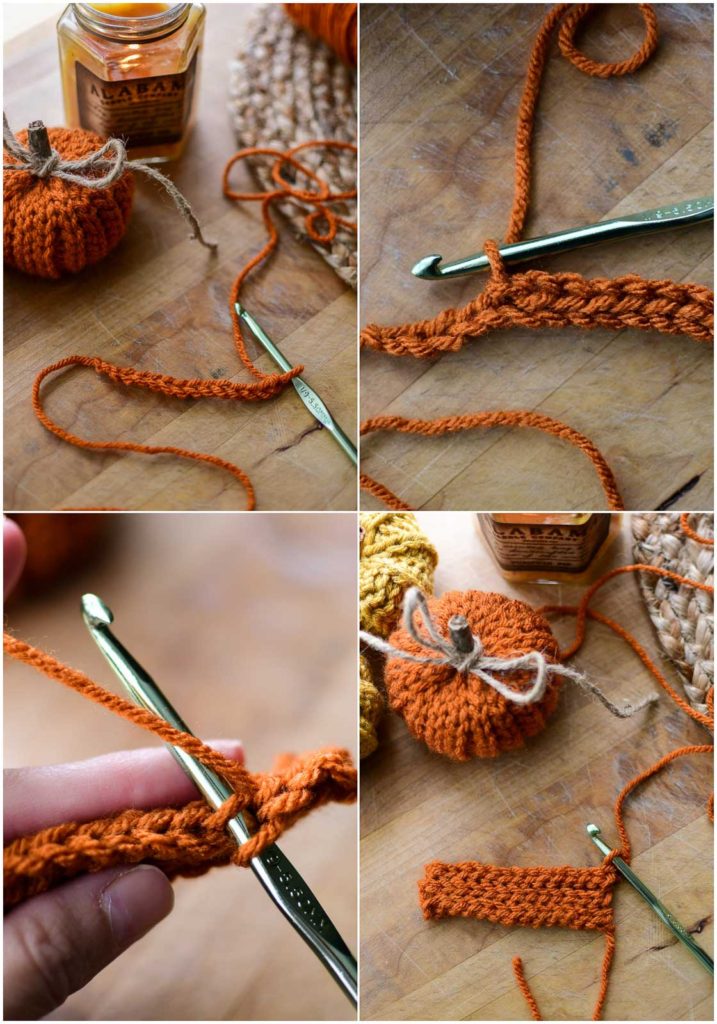
Fold the work in half with the beginning tail yarn matching up with the current loop on the hook (See picture). Turn your work so that the tail is facing you. Slip stitch to the beginning chain to attach both sides.
From here, you’re going to go under the starting chain and the back loop of the other side and slip stitch together. Do this, matching up each stitch evenly all the way across.
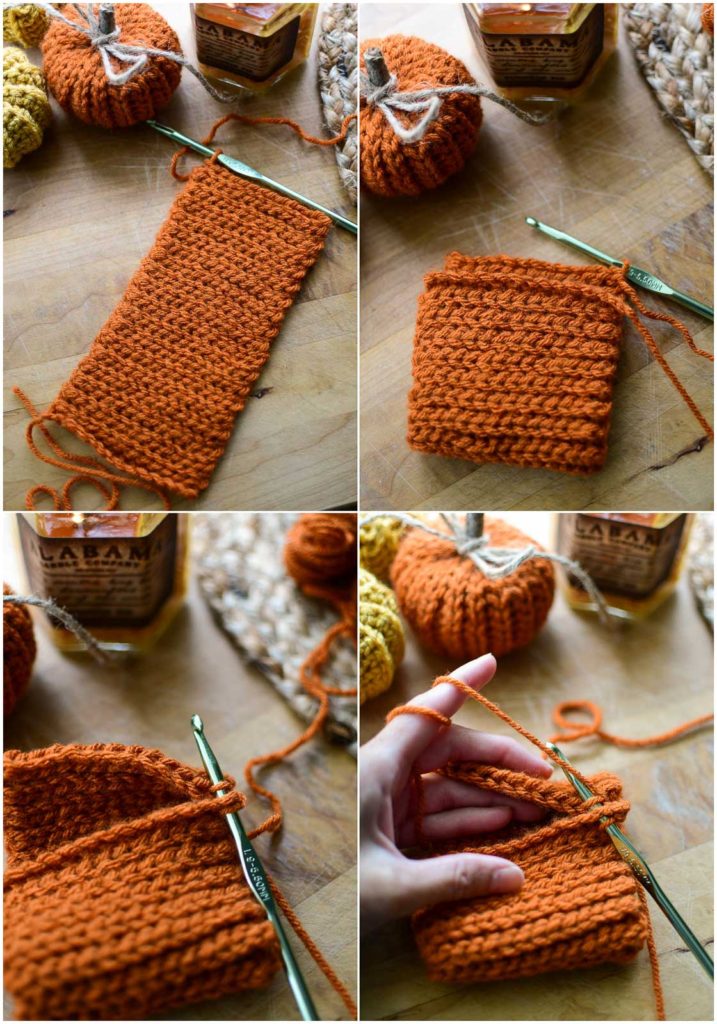
Once you’ve finished slip stitching across, your work should look like the first photo below. Fasten off and leave a long tail for weaving in. Turn the pumpkin inside out; it should look seamless from the outside (photo 2).
Take the bottom thread and darning needle and weave around going into every other stitch. Gather tightly and weave in the ends securely (photo 3). Now it’s time to to get the stuffing, sticks, and twine to finish the pumpkin.
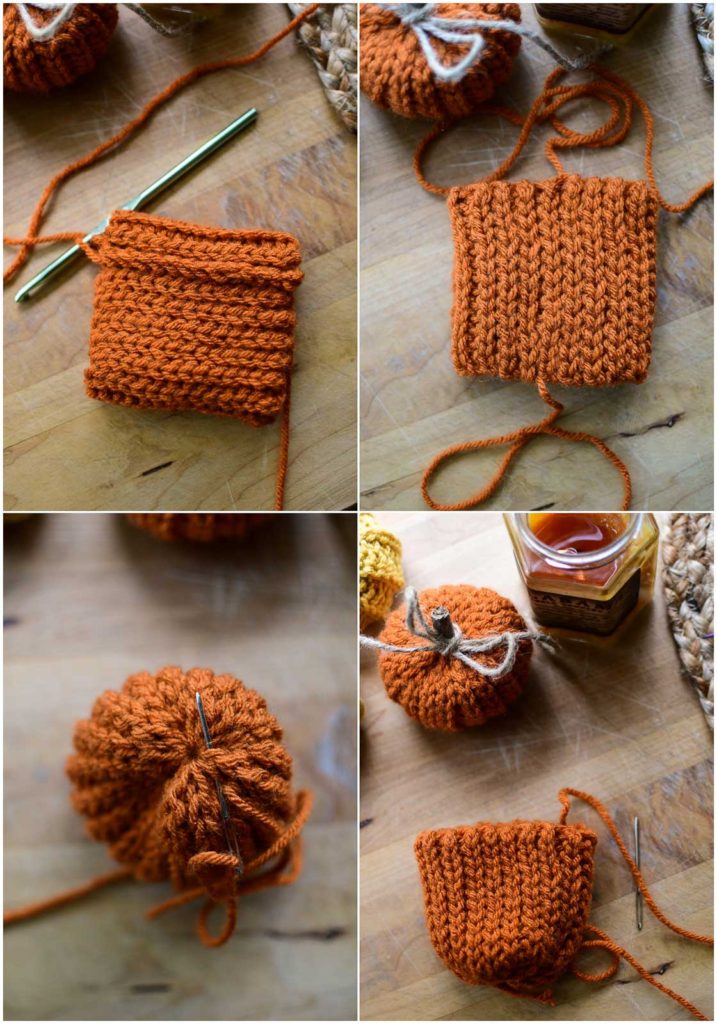
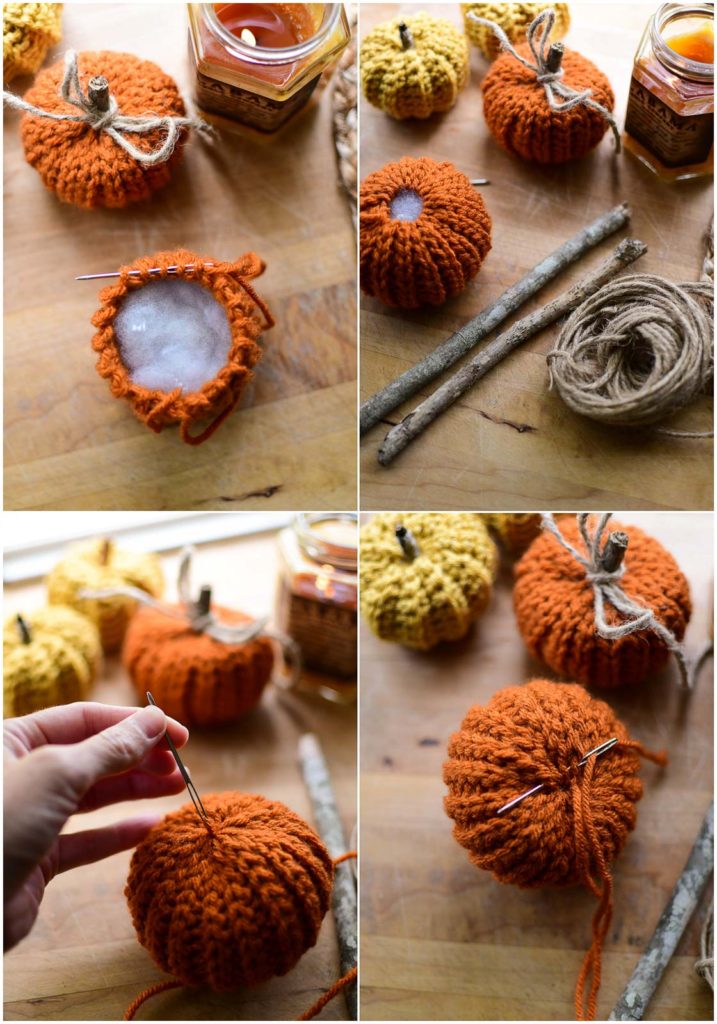
Stuff the pumpkin and then gather the top with the other thread in the same way as the bottom. Don’t pull it all the way closed yet, we want to leave enough room for a stem (photos 1 and 2).
To shape your pumpkin, pull the gathering thread closed, leaving a gap for the stem. Push the threaded needle from the top hole down into the middle of the pumpkin and all the way through to the bottom. Add your stem, and then pull tightly and the hole around the stem will close and the top should sink in. You can go back and forth from top to bottom a few times to get the shape you desire, and then tie a knot to secure, and weave in the ends (photos 3 and 4).
*A quick note about the stems-these can be removed, especially if you have a toddler or small kid that tugs on them. If you’re worried about that, you can hot glue the stems & bow into place.
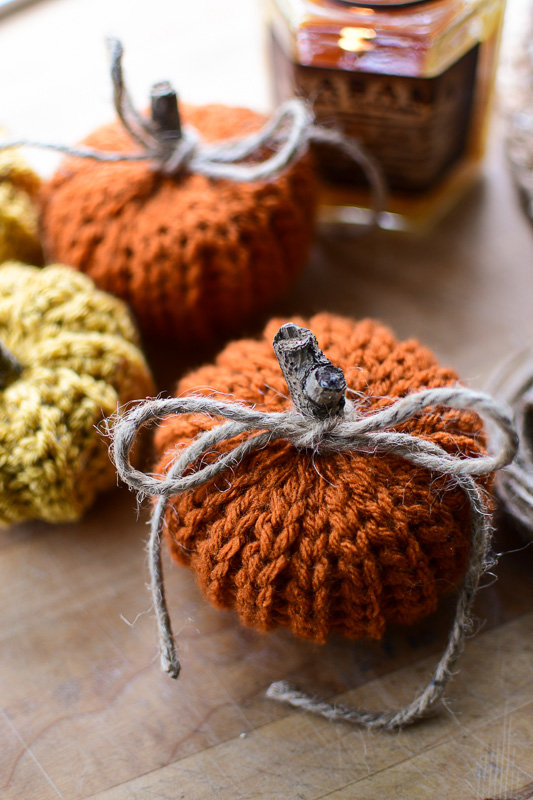
Enjoy your cute pumpkin!
For pumpkin #2 SC back loop only
Leaving a long beginning tail, Chain 14, or desired amount.
Row 1: Single Crochet in 2nd chain from hook, and continue across row. 13 stitches. Ch 1, turn.
Row 2: SC in back loop only, repeat across row. Ch1, turn.
Continue row 2 for 25 something rows or until your work is double the length of the width.
Finish as described above.
For the pumpkin #3 HDC variation
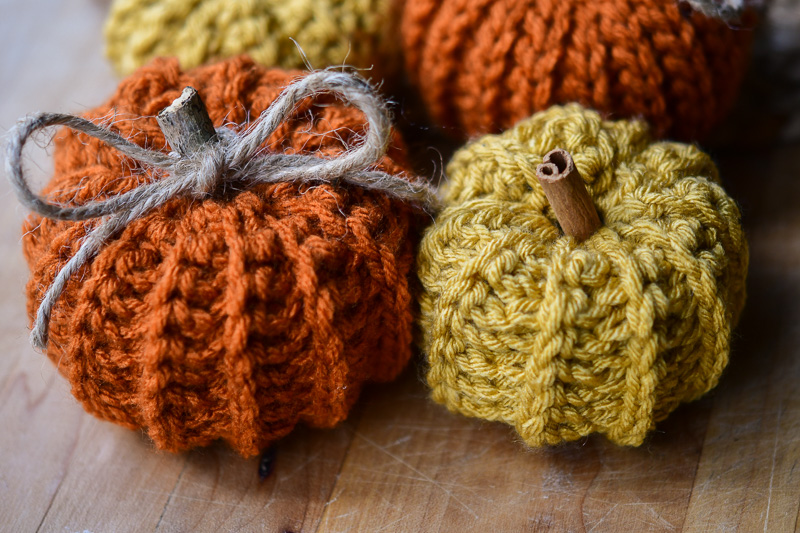
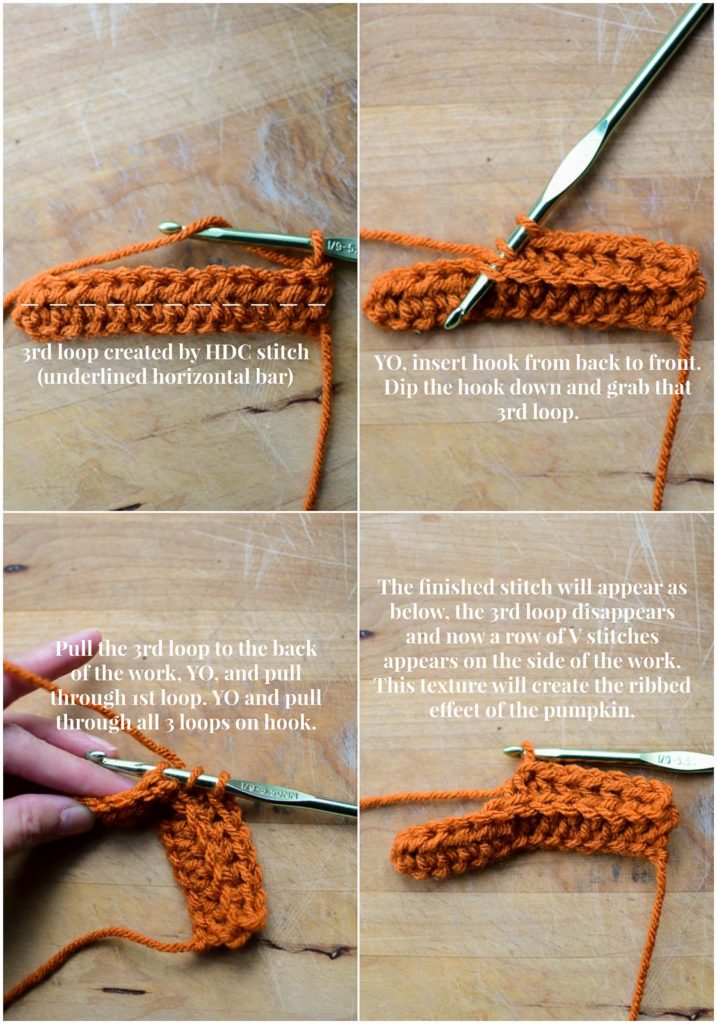
This pumpkin uses a special HDC stitch to create the unique ribbed texture with prominent ridges. To do this stitch, instead of a normal HDC where you yarn over and insert the hook under the top legs of the stitch from front to back, we yarn over and insert the hook from back to front (pictured below). Then we dip the hook down and grab the 3rd loop (horizontal bar), pull up this loop to the back side of the work. We now have 3 loops now on hook. Yarn over and pull through the first loop, then yarn over again and pull through all three loops.
Leaving a long beginning tail, Chain 15
Row 1: HDC in 3rd chain from hook, and across. Ch 1, turn. 13 stitches.
Row 2: HDC backwards around 3rd loop (YO, Insert your hook from back to front under top loops, swoop your hook down to grab the 3rd loop, yarn over, pull through 1 loop, YO and pull through all 3 loops.) Repeat across row. Ch 1, turn.
Repeat 2nd row for 20-25 rows or until your work is double the length of the width.
Finish as described above.
Looking for more crochet patterns? Try these projects next!
Easy Crochet Dishcloths or for the perfect cozy crochet throw, try the Moss Stitch Blanket
Mini Crochet Pumpkins (adjustable pattern)
3 ways to crochet pumpkins for your fall decor
Materials
- Yarn, twigs or cinnamon sticks, twine or ribbon, and poly-fil stuffing. Pictured pumpkins are using a #4 worsted weight yarn and 5.0 to 5.5 mm hooks.
Tools
- Crochet hook, darning needle, scissors
Instructions
For Pumpkin #1
- Leaving a long beginning tail, Chain 14
- Row 1: slip stitch in back loop only of 2nd chain from hook, repeat across row. 13 stitches. Ch1, turn work.
- Row 2: Slip stitch in BLO across row, Ch 1, turn work.
- Continue row 2 for 30 something rows or until your work is double the length of the width.
For Pumpkin #2
- Leaving a long beginning tail, Chain 14, or desired amount.
- Row 1: Single Crochet in 2nd chain from hook, and continue across row. 13 stitches. Ch 1, turn.
- Row 2: SC in back loop only, repeat across row. Ch1, turn.
- Continue row 2 for 25 something rows or until your work is double the length of the width.
For Pumpkin #3
- Leaving a long beginning tail, Chain 15
- Row 1: HDC in 3rd chain from hook, and across. Ch 1, turn. 13 stitches.
- Row 2: HDC backwards around 3rd loop (YO, Insert your hook from back to front under top loops, swoop your hook down to grab the 3rd loop, yarn over, pull through 1 loop, YO and pull through all 3 loops.) Repeat across row. Ch 1, turn.
- Repeat 2nd row for 20-25 rows or until your work is double the length of the width.
To Finish Pumpkins:
- Fold the work in half with the beginning tail yarn matching up with the current loop on the hook. Turn your work so that the tail is facing you. Slip stitch to the beginning chain to attach both sides.
- From here, you’re going to go under the starting chain and the back loop of the other side and slip stitch together. Do this, matching up each stitch evenly all the way across.
- Once you’ve finished slip stitching across, your work should look like the first photo below. Fasten off and leave a long tail for weaving in. Turn the pumpkin inside out; it should look seamless from the outside.
- Take the bottom thread and darning needle and weave around going into every other stitch. Gather tightly and weave in the ends securely. Now it’s time to to get the stuffing, sticks, and twine to finish the pumpkin.
- Stuff the pumpkin and then gather the top with the other thread in the same way as the bottom. Don’t pull it all the way closed yet, we want to leave enough room for a stem.
- To shape your pumpkin, pull the gathering thread closed, leaving a gap for the stem. Push the threaded needle from the top hole down into the middle of the pumpkin and all the way through to the bottom. Add your stem, and then pull tightly and the hole around the stem will close and the top should sink in. You can go back and forth from top to bottom a few times to get the shape you desire, and then tie a knot to secure, and weave in the ends.
*A quick note about the stems-these can be removed, especially if you have a toddler or small kid that tugs on them. If you’re worried about that, you can hot glue the stems & bow into place.
Notes
All instructions are for the small pumpkins pictured. To make larger pumpkins, use bulkier yarn and larger hooks. You can also make larger pumpkins with the worsted weight as well, just make your starting chain longer. To make smaller pumpkins, make your starting chain shorter. You can also use smaller yarn and hook to make even tinier pumpkins. Chain any number desired, this will dictate the height of your finished pumpkin. Crochet a long rectangle until the length is around twice the width of the short edge.



So cute! Thank you for the beautiful free crochet patterns!❤️😊
Hi Jennifer! Thank you for stopping by. Happy crocheting!
Pattern worked great! I stuffed mine with a ball of yarn.
So glad you liked the pattern!
Thank you so much for the gorgeous pumpkin patterns. I’ve made a three in a variety of fall colors and I love them all. Your directions are clear and concise.
Thank you for taking the time to let me know. I’m so glad you are enjoying the patterns! Happy Crocheting!
Hi. I found your beautiful pumpkin pattern and I love your blog. I also love cold weather and would skip over Summer heat if it was possible. I was wondering if we are allowed to sell what we make with your pattern? I look forward to trying some of your recipes. Thank you. —Charis
Hi Charis, I’m so glad you found my blog and enjoyed the pattern! You are more than welcome to sell anything you make with the patterns. Hope you enjoy the recipes as well. I’ll have some new ones posting soon for the fall season. Happy crocheting & baking!