Sunburst Granny Square Blanket
Bright, cheery, floral springtime vibes are where we’re at with this fun sunburst granny square blanket. This colorful pallete is sure to brighten your mood as you create happy stacks of squares.
Blanket Details
Hi Maker friends! I’ve been so excited to share this project with you.
This is a small, lightweight lap size blanket using worsted weight yarn. Perfect for those warmer spring evenings when you don’t want a heavy blanket to curl up with but still want to be cozy.
I’ve picked four colorful shades to create the blocks, and a separate neutral for the borders.

About the Blocks: There are 24 different color combinations and we’ll make 2 of each design for a total of 48 squares.
Seaming/Join Method: Instead of seaming the blocks directly together, I wanted the blocks to have an inner border or “sashing” (a quilting term-sashing is the fabric strips between blocks in a quilt top, used to make the quilt larger or add visual interest).
To create the solid border between the blocks, I used the continuous join-as-you-go found in this video. If you don’t want to use a JAYG method, you can recreate this same look by crocheting a 5th round of solid double crochet stitches, then use a back and forth slip stitch join to create the zig-zag seam.
For the Border: I used three rounds of single crochet with rows 2 and 3 in the back loop only for a ridged effect.

This post contains affiliate links, which means I make a small commission at no extra cost to you. See my full disclosure here.
Getting Started:
Supplies
- Hook: 4.5 mm
- Tools: Scissors & Tapestry needle
- Yarns: #4 Worsted weight. All yarns in this project are from Hobby Lobby
- Yarn alternatives: Some of my favorites for affordable, soft, washable blankets are: Premier Basix, Hobby Lobby’s I love this yarn, Soft N Sleek, Yarn ID, and Lion Brand Wool Ease.
- Colors & Quantities
- Pink: Soft Shell, Yarn Bee Yarn ID-(2 skeins)
- Purple: Rosewater, Yarn Bee Yarn ID-(2 skeins)
- Yellow: Sungold, I love this yarn-(2 skeins)
- Blue: Spa, I love this yarn-(2 skeins)
- White: Ivory tweed, I love this yarn-(3 skeins for border)
Gauge: 4 round completed square measures around 5″ (not including optional 5th round).
Finished size: Approximately 40″ x 55″
Notes
I use a smaller than called for hook for a worsted weight yarn to create a tighter looking square and borders. I prefer a less “holey” look to my crochet projects. You can use a larger hook if you prefer, but that will change the yarn quantities you might need and the finished size of the blanket.

Special Stitches
This pattern uses US Crochet Terminology and is written in typical pattern shorthand.
See the Sunburst Granny Square Tutorial for a step-by-step look if you need help with the pattern.
Puff Stitch: Yarn over and insert into stitch, YO and pull up a loop (3 loops on hook). YO and insert into stitch, YO and pull up a loop (5 loops on hook). Repeat once more (seven loops on hook). YO and pull through all 7 loops on the hook. Chain 1 to lock it in place. This completes one puff stitch.
Partial Cluster: Yarn over and pull up a loop, then pull through 2 stitches (not all). Repeat twice more until you have 4 stitches on the hook. Pull through all 4 loops then chain 2.
Cluster: Yarn over and insert into the stitch, then pull up a loop, then pull through 2 stitches (not all). Repeat three more times until you have 5 stitches on the hook. Pull through all 5 loops then chain 2.
How to make the Sunburst Granny Square Blanket
If you’d like a little extra help, check this post for a full photo tutorial on how to crochet the Sunburst Granny Square.
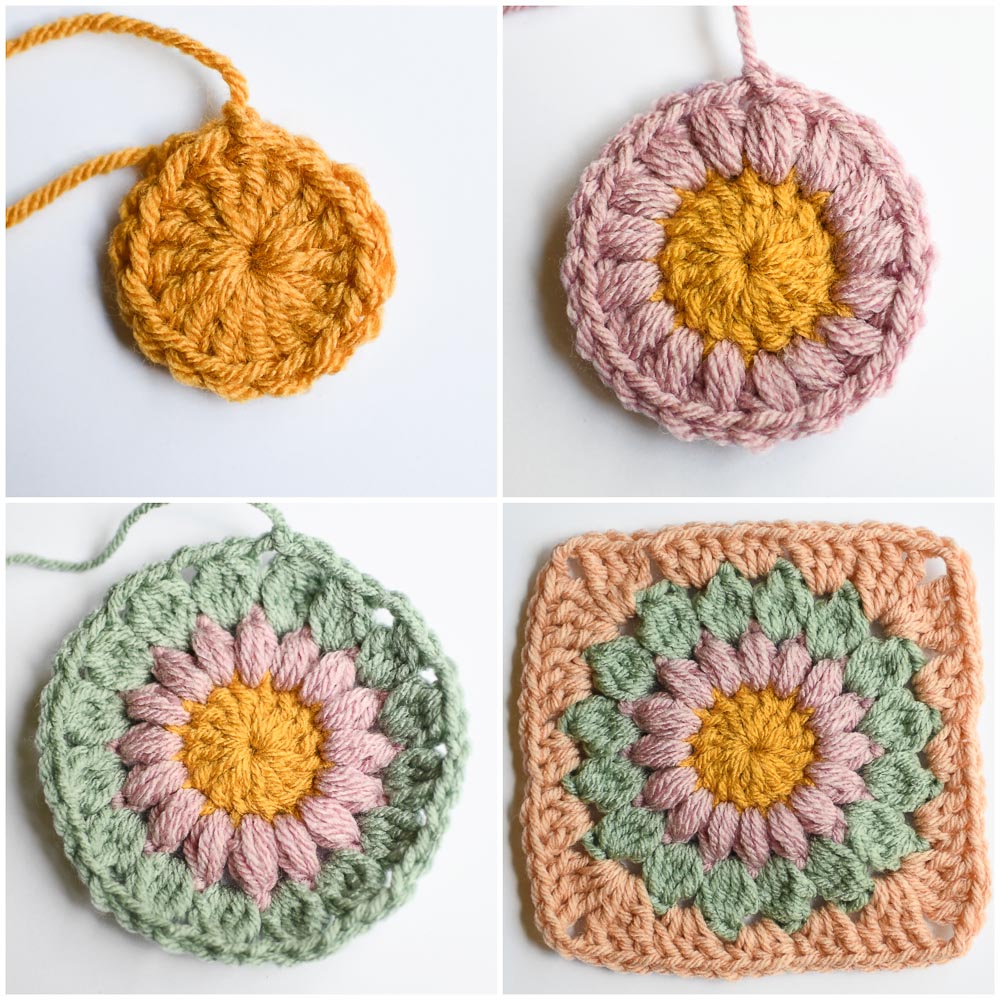
Sunburst Pattern:
Round 1: In a magic ring, Ch 3 and 15 DC. Slip stitch to the top of the first DC, not the Ch 3. Fasten off. (16 total stitches)
Round 2: Attach new yarn in any DC, then draw up a long Ch 1 and puff stitch in same space. Puff Stitch around in each DC. Slip stitch to the first Ch 1 space, not beginning puff stitch. Fasten off. (16 puff stitches made)
Round 3: Attach new yarn in any Ch 1 space, then Ch 2, and partial cluster (4 loops on hook) in same space. Regular cluster stitch in next space and each space around. Slip stitch to the top of the first Ch 2 space, not first cluster. Fasten off. (16 cluster stitches made).
Round 4: Attach new yarn in any Ch 2 space, then (Ch 3, 2 Tr, Ch 2, 3 Tr), all in same space. In next space *3 DC. Next space, 3 HDC, then 3 DC in the following space. Next space, corner stitch: 3 Tr, Ch2, 3 Tr*. Repeat until you finish the last 3 DC section, then follow these instructions for a seamless look to finish off your square.
*NOTE* Only use this 5th round if you are NOT using the continuous join as you go method to join the squares.
Optional Round 5: (This round produces a solid double crochet border) In any DC, Attach yarn with a standing double crochet stitch. Double Crochet in every stitch until you reach a corner space, then (2 DC, Ch 2, 2 DC) in the same space. Continue to DC in each stitch along the next side, making sure not to miss the first stitch after a corner. Repeat all the way around until the last stitch, then slip stitch to the first DC. Fasten off and weave in ends.

Color Guide
Use the color guide below to create your squares. The numbers align with the grid/schematic for square placement. The blanket is 6 squares wide and 8 squares long.
*Helpful Tip: You can download this PDF for a schematic/grid with the color guide. You can print it to cross off squares as you go!
The colors are written from Round 1 to Round 4.
For example: Row 1, Square 1 is R1: pink, R2: yellow, R3: purple, R4: blue
Row 1
1-pink, yellow, purple, blue
2-yellow, pink, blue, purple
3-yellow, purple, pink, blue
4-purple, pink, blue, yellow
5-yellow, purple, blue, pink
6-pink, blue, purple, yellow
Row 2
7-purple, blue, yellow, pink
8-Blue, purple, pink, yellow
9-pink, blue, yellow, purple
10-blue, yellow, purple, pink
11-purple, yellow, pink, blue
12-blue, pink, yellow, purple
Row 3
13-pink, purple, yellow, blue
14-yellow, blue, pink, purple
15-yellow, pink, purple, blue
16-purple, blue, pink, yellow
17-yellow, blue, purple, pink
18-purple, pink, yellow, blue
Row 4
19-purple, yellow, blue, pink
20-blue, pink, purple, yellow
21-pink, yellow, blue, purple
22-blue, purple, yellow, pink
23-blue, yellow, pink, purple
24-pink, purple, blue, yellow
Row5
25-pink, blue, purple, yellow
26-yellow, purple, blue, pink
27-purple, yellow, pink, blue
28-pink, purple, blue, yellow
29-yellow, pink, purple, blue
30-purple, blue, yellow, pink
Row 6
31-purple, pink, yellow, blue
32-blue, yellow, pink, purple
33-yellow, blue, purple, pink
34-blue, pink, yellow, purple
35-blue, purple, pink, yellow
36-pink, yellow, blue, purple
Row 7
37-yellow, blue, pink, purple
38-purple, pink, blue, yellow
39-yellow, purple, pink, blue
40-purple, yellow, blue, pink
41-yellow, pink, blue, purple
42-blue, yellow, purple, pink
Row 8
43-blue, purple, yellow, pink
44-pink, yellow, purple, blue
45-blue, pink, purple, yellow
46-pink, blue, yellow, purple
47-purple, blue, pink, yellow
48-pink, purple, yellow, blue
Square Placement & Layout
Layout the squares in the order listed above, or use the schematic grid below to help with placement.

Join the squares

After arranging your squares in the right order, it’s time to choose your own adventure for joining the squares. If you’d like to use a different join than the options below, you can begin joining your squares in whichever method you’ve chosen.
If you did the optional the 5th row, here’s a video to show you how to do the slip stitch zig zag seam if you want to recreate the look of my blanket without doing join as you go.
I’ve opted to use a solid continuous join-as-you-go method. This technique is easy to do, but has a bit of learning curve to it. I recommend watching a few videos to get the hang of it before you get started.
Video 1-You’ll only need to watch the first minutes of this video for her explanation of how the join works. If you need another visual, this is another good video to get the overall idea of what we’re doing (we’re doing a solid row, not a granny cluster row though).
If you’re using the CJAYG, it’s time stack your squares to get them ready to join in the right order. Starting at Row 1, stack your squares from right to left. Square 6 should be on top of the stack. Number each stack with a post-it note to keep track.
Follow along with this video to work the Continuous Join As you Go until all squares have been joined. After you finish the last stitch, slip stitch to the beginning, Ch 1 and proceed to the border.

Work the border & finish your blanket
Once you have joined all the squares and are back to the beginning, it’s time to create the border.
Border: Single crochet in every stitch, until you reach the corner space, then SC 2, Ch 2, SC 2 all in the same space. Complete until all sides are finished. When you’ve reached the end of the row, slip stitch to the first SC.
Ch 1, SC in the first stitch, and continue around in the same manner, but for this and the next row, SC in the Back Loop Only. When you’ve completed all three rows of the border, complete the invisible fasten off for a seamless look to your border.
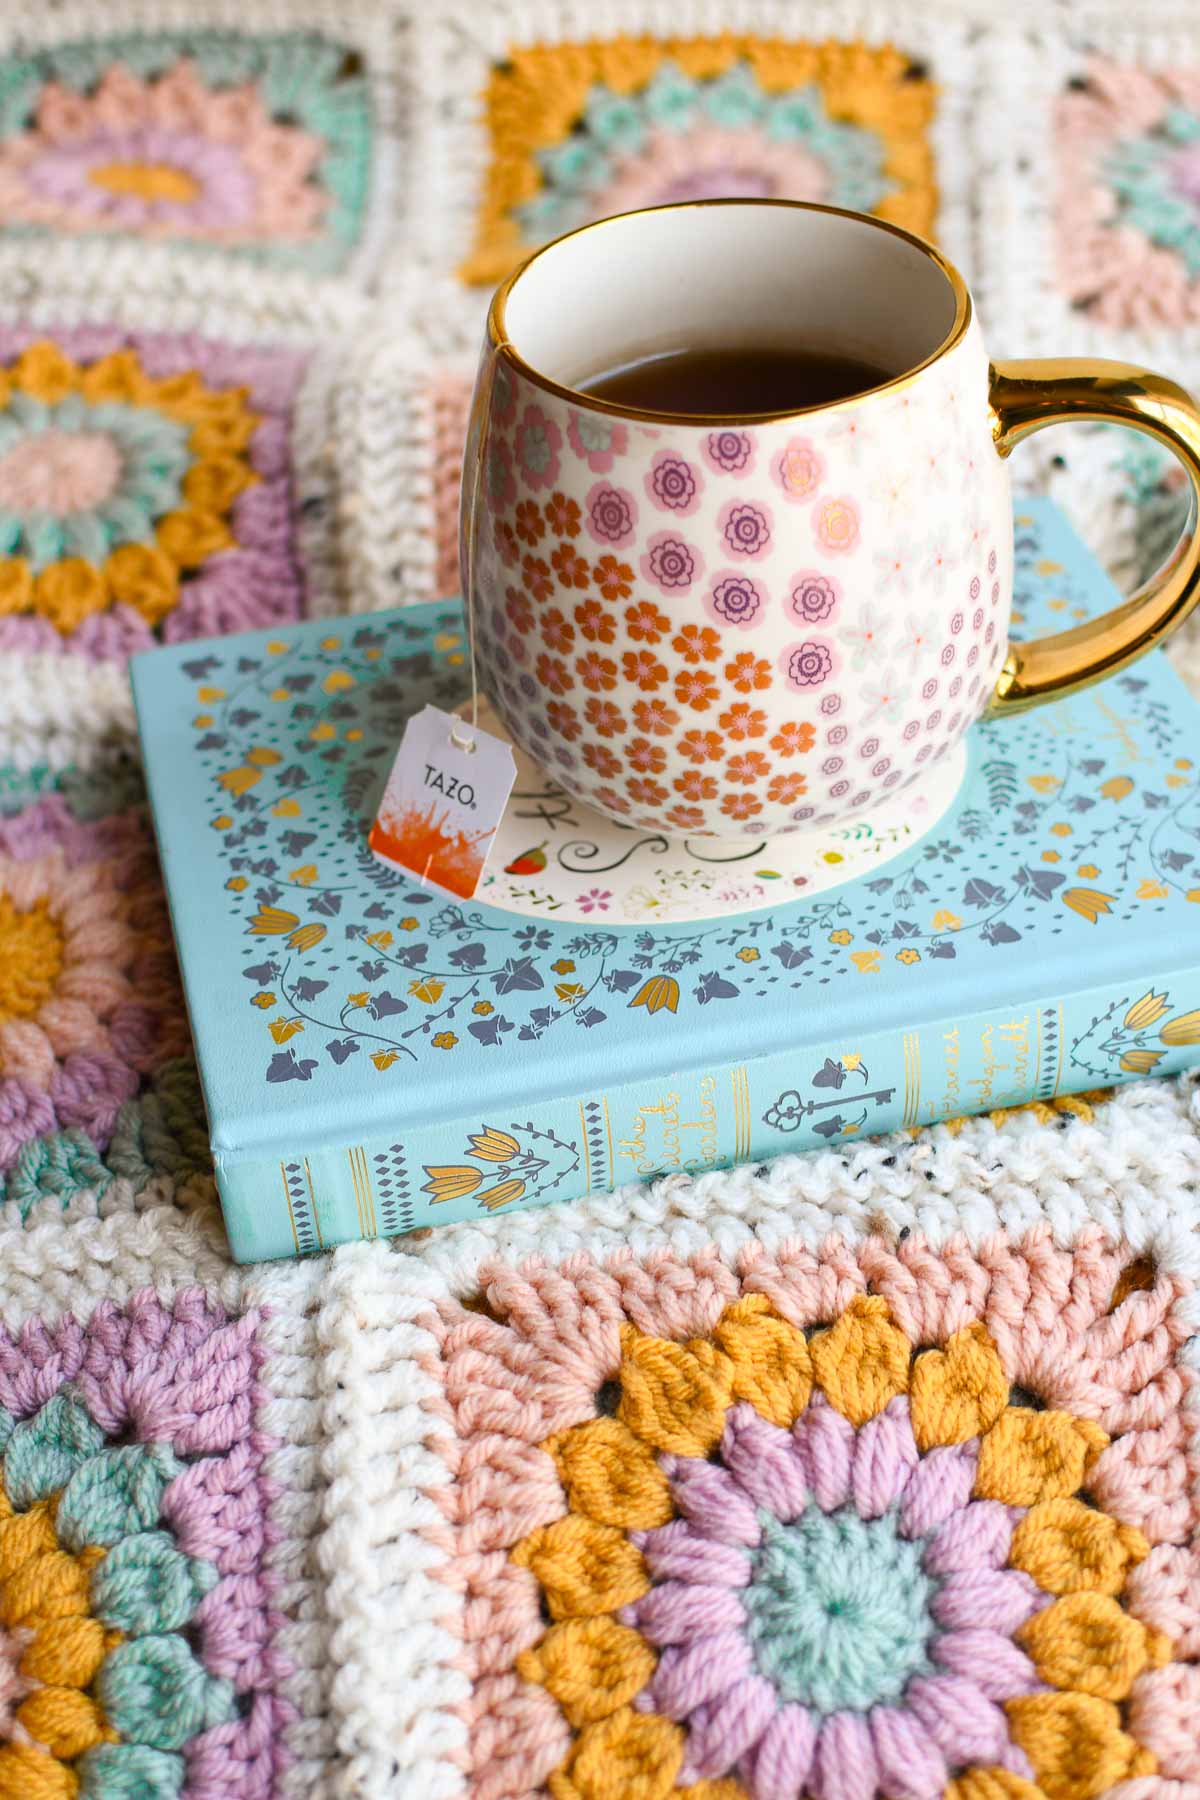
Weave in the ends, pour yourself a cup of something warm and enjoy your beautiful blanket!
I’d love to hear from you!
If you try this pattern and love it, please leave a comment and let me know how it went. Happy Crocheting!
More patterns you’ll love
If you’ve enjoyed this blanket pattern, try the popular Moss Stitch Blanket next. Made with basic stitches and a one-row repeat, this blanket is perfect for easy stitching!


Clear, easy to follow instructions.
Hi Janice, thanks for your comment! I’m glad that the post was helpful to you!
I am trying to buy the PDF but the link isn’t working. Can you help out this old lady?
Hi Christine, I don’t have a PDF to buy, just a link to a PDF that you can download and print. Here is the direct link to it https://www.katiegetscreative.com/wp-content/uploads/2025/01/SunburstGrannySquareGrid-1.pdf
Let me know if you still need help!
Hi currently making this blanket and made square 37 twice because it was copied to square 38 🙁 hopefully you can fix and repost for future makers
Hi Jenna, thank you so much for letting me know about the error in the pdf! I’ve corrected & updated the link. Happy Crocheting!
Hi Katie, this is a gorgeous blanket. My daughter sent it to me to make for her. I can’t wait to get started. Is there a place that I can print out all the instructions without the ads?
Thank you
Diane
Hi Diane, I don’t have a printable version of this yet, but I’m working on it!
It’s very possible I missed this detail in the post, but what is the finished size of this blanket? I’m using this pattern to make a baby blanket and wondering if 4 rows of 4 squares would be a reasonable size, or if 5×5 would be better? Do you have insight into this?
Hi Kayla, I do have it listed under the getting started section, but the finished size is approximately 40″ x 55″. If you’re using the same join as the blanket here, a 4×4 (without the border stitches) would measure around 24 inches, and a 5×5 would be a little over 30 inches. If I were making a baby blanket, I would go with the 5×5 size. Happy Crocheting!
Hey! I was making the squares and when I layed them out it was a lot smaller than I expected. I think I will end up doing closer to 10×12 instead of 6×8. So, if others want the blanket to be more similar to the size of a throw blanket id recommended making it a bit bigger <3 Beautiful pattern though I've absolutely loved making it so far!
Hi Diane, this blanket is a small lap sized throw, just enough for covering the legs while snuggling up. The sashing between the squares and the border do add some height and width to the blanket though so keep that in mind when laying out your squares. Let us know how you’re larger size measures once it’s finished!
Question – could you do a pattern schematic for a larger blanket? A throw size?
Hi Amanda! If you’re wanting to make this larger, I would make rows 1-4 (24 blocks, one in each color combo) until you’ve reached the size of a blanket that you’ll like.
Hi! Is this an easy blanket for beginner crocheters?
Hi Amber, I don’t know that I would recommend it as a first blanket project, since it can take a while to make the amount of squares needed for a blanket, but the squares are fun to make! It can absolutely be a great project for an ambitious beginner! If you’re looking for a quick make, with easy one row repeats, I have a Moss Stitch blanket and one with the Lemon Peel stitch as well that are fun and relaxing projects.
Hi! Can you clarify if you did the 5th row of white before you joined? Or did you have just the colored squares and then joined? I love the look of yours so want to do the same method. Thank you!
Hi Naomi! I only did the 4 round colored squares and then did a continuous join-as-you-go in the white color. If you don’t want to try that method, you can complete the 5th row of white and then join however you like!
Do I need to block my squares before joining them?
Thank you an awesome pattern!
Hi Susan! I didn’t block them before I joined, but I gently steamed them with a handheld steamer.
How many ounces were each skein??Trying to find out how much to buy since each comes in a big and small version. Thank you!!
Hi Molly, here are the links for the yarns I used. The blue & yellow in I Love This Yarn come in 7 oz./355 yard skeins, and the pink & purple in Yarn ID is 5 oz./252 yards. For the tweed border, that is I love this yarn Tweeds in 5 oz./252 yards. It looks like the Yarn ID is out of stock online, so I’m not sure if it’s still being carried in the stores.
https://www.hobbylobby.com/yarn-needle-art/yarn-tools/yarn/12-spa—i-love-this-yarn/p/81040492
https://www.hobbylobby.com/yarn-needle-art/yarn-tools/yarn/tweed-i-love-this-yarn/p/36496